
I didn’t think much about frame protection until I watched a rock the size of a golf ball ping off my downtube on a rocky chute and leave a chip you could catch with a fingernail. That bike was six weeks old.
Frame protection isn’t glamorous, but it’s one of the cheapest, easiest things you can do to keep a bike looking and running right for years. Here are your real options and where to put your money first.
Why Bother Protecting Your Frame at All
It’s not just about keeping things shiny, though that’s part of it. A few reasons this actually matters:
- Resale value. A frame covered in rock chips and scrapes tells the next buyer a story you don’t want told. Clean paint sells faster and for more.
- Chain slap. On rough terrain, your chain bounces against the chainstay constantly. Left bare, that’s a slow grind that wears through paint and eventually into the tube itself. It’s also just loud — and a quiet bike is a more pleasant bike.
- Cable rub. Housing runs along the frame near the head tube and down tube will wear a groove in the paint over months of flex and vibration if nothing’s there to stop it.
- Material sensitivity. This one matters more depending on what your frame’s made of — I get into the differences in what your frame is actually made of, but the short version is that carbon needs more consideration here than metal. REI’s materials guide notes that carbon frames are light and strong but comparatively brittle when it comes to impacts — exactly the kind of hit a downtube guard is designed to absorb before it reaches the layup underneath.
None of this is life-or-death stuff. It’s maintenance-minded thinking, the same instinct that has you checking tire pressure before a ride instead of after a pinch flat.
Pre-Cut Frame Protection Kits
These are shaped pieces of thick, clear film designed to match specific spots on your frame — downtube, top tube, chainstays, seat stays, plus small circular patches for cable contact points. I’ve run kits like this on every bike I’ve owned longer than a season.
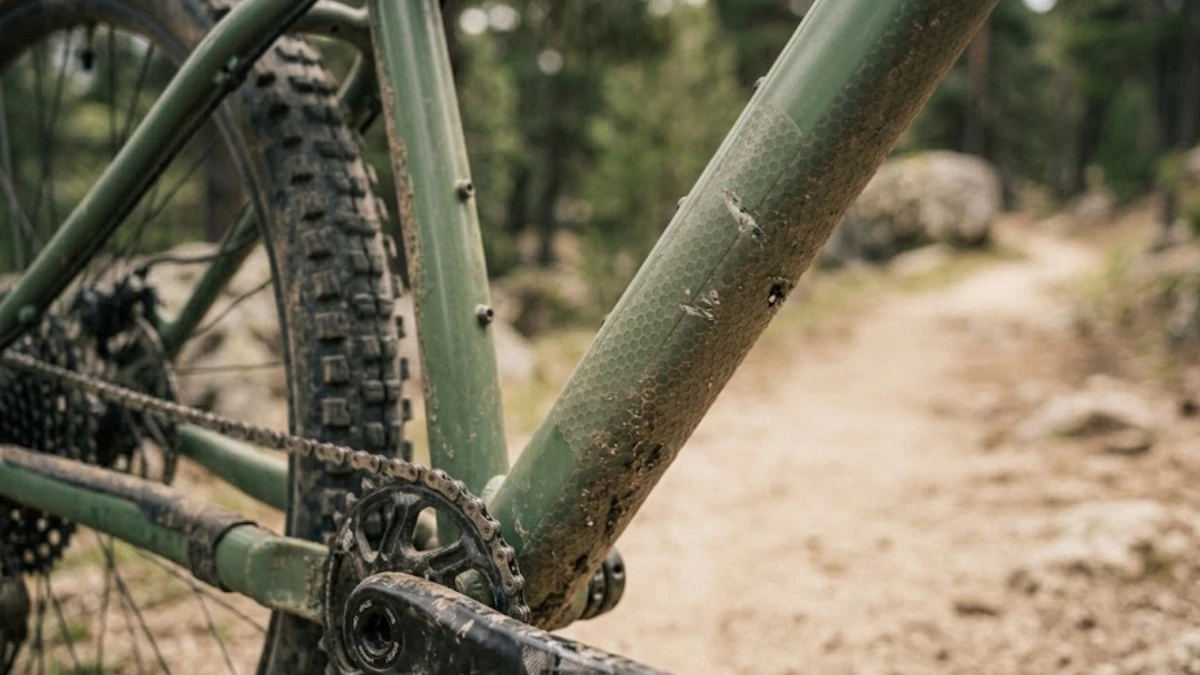
The material is usually an automotive-grade vinyl or urethane film, and one common example — the All Mountain Style Basic Honeycomb kit sold through REI — covers the downtube, chainstay, and top tube with adhesive honeycomb-textured PVC, plus smaller circle pieces specifically for cable wear points. That’s a fair representation of what most kits in this category look like, regardless of the brand you land on.
What’s good about them: the fit is precise since it’s cut for your frame’s contact points, coverage is thorough, and most of these films are tough enough to shrug off years of trail debris without yellowing.
What’s not: they cost more than a roll of tape, and getting one on bubble-free takes patience the first time.
How I install mine: clean the frame thoroughly and let it dry completely — any dust under the film shows. A light spray of soapy water on both the adhesive and the frame lets you slide the piece into position before it grabs. Work from the center out with a squeegee or a stiff card wrapped in a soft cloth, pushing bubbles toward the edges. Go slow on the first one; you’ll be faster by the third piece.
Protection Tape (Rolls)
This is the DIY version — a roll of clear adhesive film you cut yourself. Cheaper, more flexible in terms of where you use it, but the results depend entirely on how careful you are with scissors.
I keep a roll of this around for odd spots a pre-cut kit doesn’t cover — a specific rub point where my pack strap contacts the top tube, for instance. Round the corners of any piece you cut; sharp corners catch and peel faster than rounded ones. Clean the frame first, apply with steady pressure, and don’t rush the edges.
Tape wins on cost and flexibility. It loses on finish — unless you’re genuinely precise with a blade, the edges won’t look as clean as a pre-cut kit, and coverage tends to be spottier unless you’re willing to cut many pieces.
Full Frame Wraps
A full wrap covers most or all of the frame in a single continuous layer of vinyl — clear for pure protection, or colored/patterned if you want to change how the bike looks entirely. This is the option people reach for when a frame already has some cosmetic damage they want to hide, or when they want a different color without repainting.
It’s also the most involved option by a wide margin. Getting a full wrap on without wrinkles around the head tube junctions and bottom bracket shell is genuinely difficult — I’ve watched experienced mechanics take an entire afternoon on one frame. A heat gun helps the vinyl stretch around curves, but if you’re not confident with it, this is the one job in this whole list I’d actually pay a shop to do.
Don’t Skip the Small Stuff
A few specific pieces of protection punch above their weight:
- Chainstay protectors — neoprene sleeves, molded rubber, or heavy mastic tape specifically for the chain-slap zone. Some bikes ship with a molded guard already; if yours didn’t, this is worth adding on its own even if you skip everything else.
- Crank arm protectors — small rubber caps or patches where your shoes rub during pedaling. Easy to forget, noticeable once the paint’s gone.
- Fork leg protectors — similar concept applied to the lower legs of your suspension fork, which take their own share of rock strikes. If you’re picking a fork or dialing one in, our full breakdown of suspension forks covers what’s worth protecting on that end too.
Where to Prioritize If You’re Not Doing the Whole Bike
If budget or patience means picking and choosing, this is roughly the order I’d go in:
- Downtube — takes the most direct hits from front-wheel spray.
- Chainstay — stops chain slap before it starts.
- Cable contact points, especially near the head tube.
- Top tube — general knee and hand contact, plus transport rub.
- Crank arms — slow, cumulative shoe wear.
Keeping It Looking Right Over Time
This stuff is close to zero-maintenance once it’s on. Wash the bike as usual — the film holds up well — and wipe around the edges occasionally so grime doesn’t build up in the seams. When the protection itself starts looking chewed up, that’s it doing its job; peel it off (it shouldn’t take paint with it if the surface were clean going in) and put on a fresh piece.
Frame protection won’t make you faster or change how the bike rides. What it does is buy you years of not caring when a rock pings off the downtube, because you already knew it would and put something there to take the hit instead of your paint. Check out our Mountain Bike Components Guide for how this fits into the bigger picture of keeping the whole bike dialed.