
I’ve bent a crank arm on a rock ledge in Moab, and I’ve dropped a chain mid-climb on a trail I’d ridden a hundred times — both taught me more about cranks and chainrings than any spec sheet ever did. These two parts don’t get the attention suspension or brakes get, but they’re the reason your leg power actually turns into forward motion.
This guide walks through what actually matters when you’re choosing or upgrading a crankset: material, crank length, chainring size, and the compatibility details that trip people up. For the full picture of how this fits with your drivetrain as a whole, start with our main guide to mountain bike components.
Crank Arms: Material and What It Actually Changes
Most mountain bikes ship with aluminum crank arms, and for good reason — they’re strong, reasonably light, and they shrug off the occasional rock strike without drama. I’ve run aluminum cranks through multiple seasons of rough terrain and never thought twice about them.
Carbon cranks shave real weight and look the part, but they trade some impact tolerance for it. A glancing hit that scuffs an aluminum arm can occasionally crack a carbon one, and repairs aren’t a roadside fix. Unless you’re chasing grams for racing, aluminum is the smarter default — put the money into your fork or dropper post instead.
Crank Length: Leverage vs. Clearance
Crank arms are levers, and length changes the trade-off. Longer arms (175mm) give you more leverage for grinding out a climb. Shorter arms (165–170mm) sacrifice a little of that leverage for something mountain bikers actually feel more often: ground clearance.
Adult mountain bike cranks are typically offered from 165mm to 180mm, with 170mm the most common length across the industry — a range that’s held steady for decades because it works for most body types.
Where you land depends on your riding, not just your height. If you’re doing tight, technical singletrack with rock gardens and roots, shorter cranks mean fewer pedal strikes mid-stroke — that’s why a lot of enduro and DH-leaning riders have drifted toward 165mm even on bikes that used to spec 175mm. XC and trail riders who spend more time seated and spinning tend to stick with 170–175mm without issue. If you’re not hitting your pedals on things, don’t overthink it — run what came on the bike.
Single, Double, or Triple: Why 1x Won
Triple chainrings are effectively extinct on new mountain bikes, and double setups are fading fast outside entry-level builds. A single chainring (1x) up front is the standard now, and once you understand why, it’s obvious it’s not a fad.
Losing the front derailleur and extra rings drops weight, removes a shifter and cable from the equation, and — this is the part that matters most on the trail — cuts down dramatically on dropped chains. The rear cassette picks up the slack with a much wider gear range than cassettes had even five years ago, so you’re not actually losing usable gears by dropping to one ring up front.
How Narrow-Wide Chainrings Keep the Chain On
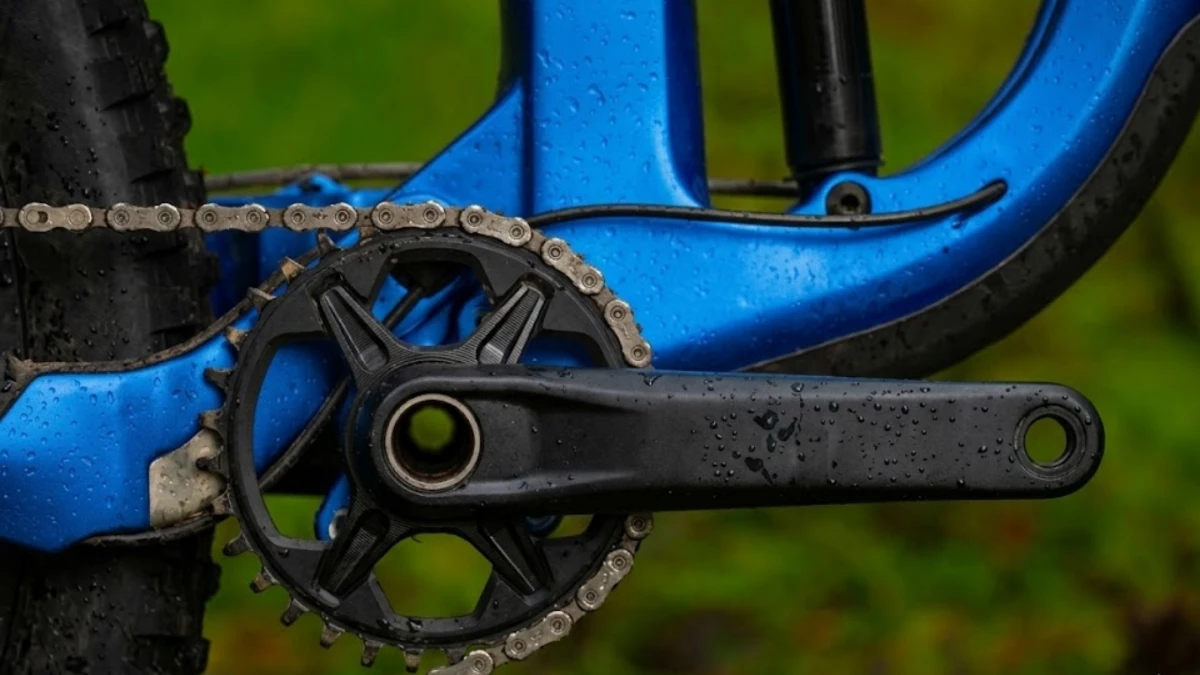
The reason 1x setups stay so reliable on rough ground comes down to tooth shape. A standard chainring cuts every tooth to the same width, sized for the narrower inner links of the chain — which means every other tooth barely makes contact with the wider outer links.
A narrow-wide chainring alternates tooth width to match the chain’s alternating inner and outer links, so the chain grips the ring far more securely through the whole rotation. That’s the design that made front derailleur-free 1x setups viable for rough trail riding in the first place, and it’s why nearly every 1x-specific chainring on the market today uses some version of it.
Chainring Size: Picking the Right Tooth Count
For 1x setups, chainring size is your one big gearing decision up front, usually somewhere between 28T and 34T.
- Smaller (28–30T): Easier pedaling, better for steep, sustained climbing or riders prioritizing spin over speed.
- Larger (32–34T): Harder pedaling but more top-end speed on flats and descents — a better fit if your local trails are rolling rather than steep.
I run a 30T on my trail bike because most of what I ride mixes punchy climbs with technical descents, and I’d rather have the easier gear in reserve than grind out of the saddle on every pitch. If your terrain is genuinely flat and fast, sizing up to 32T or 34T is worth trying before you assume smaller is always better — it isn’t; it’s terrain-dependent.
Bottom Bracket Compatibility: The Non-Negotiable
This is where upgrades go wrong. Your cranks connect to the frame through the bottom bracket, and cranksets are built around specific spindle interfaces and bottom bracket standards that aren’t universal across brands.
Buy a crankset that doesn’t match your frame’s bottom bracket shell, and you’re not installing anything — you’re returning it. If you’re upgrading rather than buying a complete bike, check your current bottom bracket standard first, or have a shop confirm it before you order. It’s a five-minute check that saves a returned part and a wasted afternoon.
Buying by Budget and Riding Style
Entry-level: Aluminum cranks with a steel or aluminum chainring. Durable, affordable, and honestly almost all most riders need for the first couple of seasons.
Mid-range: Lighter forged aluminum cranksets, direct-mount chainrings for easier tooth-count swaps down the line. This is where most trail riders should be spending.
High-end: Carbon cranks, if weight is genuinely a priority for racing or long backcountry days. For everyone else, it’s a marginal gain for a real cost jump.
Whatever tier you’re in, don’t separate the crankset decision from the rest of your drivetrain — our full breakdown of 1x and 2x drivetrain setups covers how cranks, cassette, and chain need to work together, and how much range a wide-range cassette actually covers matters just as much as chainring size when you’re dialing in gearing for your terrain.
Installation and Maintenance
Get a crank or chainring swap done by a shop mechanic if you’re not already comfortable with torque specs — cranks are one of the few components where getting the install wrong can damage the bottom bracket or the crank arm itself.
Ongoing maintenance is simple. Rinse the chainring after muddy rides, check the teeth periodically for the hooked, shark-fin wear pattern that signals it’s time for a replacement, and snug your crank bolts every so often — a loose crank arm will chew up the spindle interface fast. If you’re swapping chainrings, matching your chain to a narrow-wide ring matters more than people expect, and it’s worth reading before you buy a ring your current chain won’t play well with. For the rest of the system, keeping the whole drivetrain running clean will do more for shift quality and chain life than any single upgrade.
Final Thoughts
Cranks and chainrings don’t get the spotlight, but they’re doing the actual work of turning your effort into speed. Get the material and length right for how you ride, get the chainring size right for your terrain, and never skip the bottom bracket compatibility check — that’s the whole decision, and it’s simpler than the spec sheets make it look.